Homemade Peppermint Patties

I’ve been making peppermint patties since I began baking and cooking on my own.

Peppermint Patties // Warm Vanilla Sugar

It seemed easy enough – make the filling (no bake!) and coat it in chocolate. But you see, coating a soft filling in chocolate when you’re not experienced can sometimes lead to ugly treats. And this is why I haven’t posted these delicious chocolate covered balls of love before.

Peppermint Patties // Warm Vanilla Sugar

I’m happy to report that I made peppermint patties again this year with success. They are soft and chewy on the inside with an awesome chocolate coating on the outside. Perfect for the holidays!

Peppermint Patties // Warm Vanilla Sugar

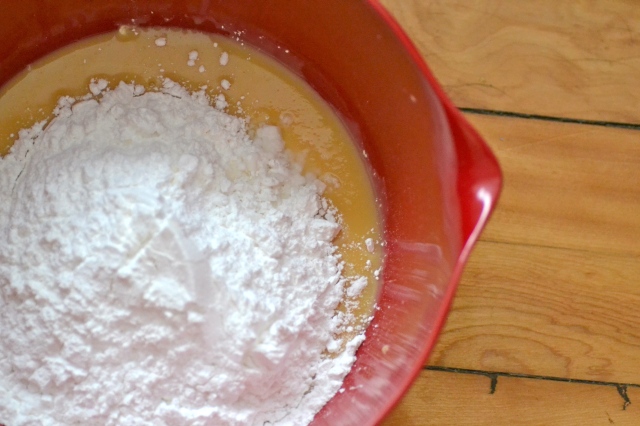
Let’s get started! Add condensed milk, 2 cups of powdered sugar, and peppermint extract to a large mixing bowl.

DSC_0385

Mix everything on medium speed using a hand mixer (or your paddle attachment) until all the ingredients are well incorporated. Add more powdered sugar, 1/2 cup at a time.

DSC_0386

Work until the dough is stiff but still pliable.

DSC_0387

Roll 3/4″ balls of dough between the palms of the hands.

DSC_0388

Press each ball down slowly and set the flattened disk on a flat cutting board or plate. Transfer peppermint disks to the freezer for no longer than 30 minutes. While the dough is chilling, temper the chocolate coating.

DSC_0391

Place chocolate chips in a microwavable bowl. Melt the chocolate in 30 second increments, making sure to stir after each time until chocolate is smooth. Stir in shortening to thin the chocolate. Remove patties from the freezer.

DSC_0392

Place a patty on the tines of the fork (or super duper dipping tool) and dip in the chocolate until completely covered. Allow excess chocolate to drip off the patty before setting each one on top of wax or parchment paper.

Peppermint Patties // Warm Vanilla Sugar

Allow the chocolate coated peppermint patties to completely set up. This can be done quicker by placing the patties in the refrigerator.

Peppermint Patties // Warm Vanilla Sugar

The peppermint patties are ready when they are dry to the touch.

Peppermint Patties // Warm Vanilla Sugar

Enjoy! They kind of look holy in this picture, don’t ya think?

Peppermint Patties // Warm Vanilla Sugar

Homemade Peppermint Patties
Recipe adapted from Savory Sweet Life
Makes 32 candies

Ingredients
1 can sweetened condensed milk
5 1/2 cups powdered sugar, sifted
1/2 tablespoon peppermint extract
3 cups semisweet chocolate chips
3 tablespoons shortening

Directions
Add condensed milk, 2 cups of powdered sugar, and peppermint extract to a large mixing bowl. Mix everything on medium speed using the paddle attachment until all the ingredients are well incorporated. Add more powdered sugar, 1/2 cup at a time, until the dough is stiff but still pliable.

Roll 3/4″ balls of dough between the palms of the hands.

Press each ball down slowly and set the flattened disk on a flat cutting board or plate. Transfer peppermint disks to the freezer for no longer than 30 minutes. While the dough is chilling, temper the chocolate coating.

Place chocolate chips in a microwavable bowl. Melt the chocolate in 30 second increments, making sure to stir after each time until chocolate is smooth. Stir in shortening to thin the chocolate. Remove patties from the freezer.

Place a patty on the tines of the fork and dip in the chocolate until completely covered. Allow excess chocolate to drip off the patty before setting each one on top of wax or parchment paper.

Allow the chocolate coated peppermint patties to completely set up. This can be done quicker by placing the patties in the refrigerator. The peppermint patties are ready when they are dry to the touch. Enjoy!

Eggnog Fudge

Some things just scream Christmas for me.

Eggnog Fudge // Warm Vanilla Sugar

1. Eggnog.
2. Gingerbread anything.
3. Cats in Christmas hats….

grumpy-cat-christmas-01

I officially finished all of my Christmas baking yesterday, and tried quite a few new recipes from various bloggers. Needless to say, my pants don’t fit. Despite running between 5-15 miles five days a week my body has decided to let me know that I’m now 25, and can’t eat whatever I wan’t anymore. I was warned about this day…damn you metabolism!

Eggnog Fudge // Warm Vanilla Sugar

I can deal with stretchy pants though, because if nothing else, the extra pound or two I’ve gained has gone straight to my butt, and I think it looks just fine ;)

Eggnog Fudge // Warm Vanilla Sugar

I’ve had this recipe for Eggnog fudge waiting to be made since I saw it a year ago on Brown Eyed Baker‘s blog. No need for me to repost the recipe here, since I followed her instructions to a T, but this recipe is a must make for any eggnog lovers out there. If you’re a hater…I’d skip this one.

Eggnog Fudge // Warm Vanilla Sugar

Recipe for Eggnog Fudge here.

Chocolate Gingerbread Cookies

Chocolate Gingerbread Cookies {Warm Vanilla Sugar}

When I think of Christmas baking my mind immediately goes to cookies. And hunny, I’ll take any kind!

Chocolate Gingerbread Cookies {Warm Vanilla Sugar}

I am so pleased that I was able to participate in the 2012 Cookie Swap this year hosted by Lindsay from Love and Olive Oil and Julie from The Little Kitchen. I sent out 1 dozen of these chocolate gingerbread cookies to three different food bloggers (The Gourmet Housewife, The Goodie Girl, and Sweet Twist of Blogging) and I’m so happy I learned about them through this process.

Chocolate Gingerbread Cookies {Warm Vanilla Sugar}

I was also sent 2 dozen cookies from 2 different bloggers. The first box to arrive was from The Yum Yum Factor. These were a compost bar filled with chocolate chips, pepitas and potato chips!!

Cookie Swap

The second box was from Strawberry Ginger, and she made a totally awesome and chewy classic oatmeal cookie. Thanks guys!

IMG_0665

I was actually supposed to receive three boxes off cookies, but either the 3rd person sent their cookies late or not at all. Big time sad face if it’s the latter!! Anyway, this process was so fun and I sure hope it happens again next year!

Chocolate Gingerbread Cookies {Warm Vanilla Sugar}

Let’s make some cookies, shall we?! Gather all of your ingredients.

DSC_0385

Sift the flour, ground ginger, cinnamon, cloves, nutmeg, and cocoa together into a medium bowl.

DSC_0388

Place the butter and grated fresh ginger in the bowl of a stand mixer and beat (with paddle attachment) on medium until the butter is fluffy and light-colored (3-4 minutes). Beat the brown sugar into the butter until combined. Beat the molasses into the butter until combined.

DSC_0395

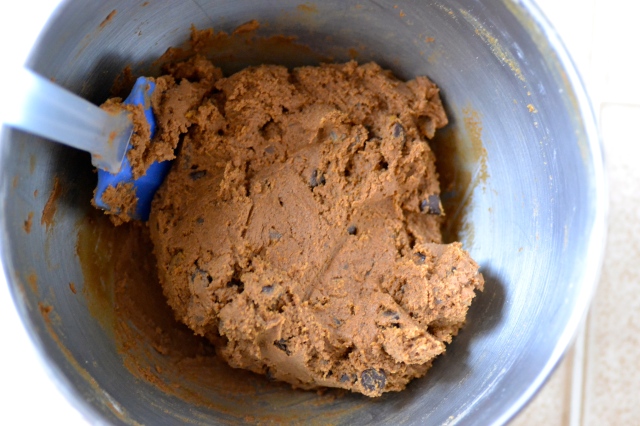
In a small bowl, stir the baking soda into the boiling water until dissolved. Pour half of the flour mixture into the butter-sugar mixture and mix until combined. Add the baking soda-water mixture, beat and then add the remaining flour mixture and beat until dough is uniform in color and texture.

DSC_0398

Mix in the chocolate and candied ginger.

Cookie dough

HELLO!

Cookie dough

Turn the dough out onto a sheet of plastic wrap.

Cookie dough

Place another sheet on top and flatten the dough to a 1-inch thickness. Wrap it up and refrigerate for at least 2 hours or overnight.

Cookie dough

Remove the dough from the refrigerator and tear off chunks of the dough to roll into balls – about 1 1/2-inches in diameter (move quickly!). Set each dough ball on a plate. Refrigerate the finished dough balls for 20 minutes.

Preheat oven to 325°F. Line baking sheets with parchment paper. Roll each ball in the granulated sugar to coat completely.

Cookie dough

Set on parchment-lined baking sheets, about 2 inches apart.

Cookie dough

Bake for 10-12 minute Let cool on baking sheet for 5 minutes before removing to a cooling rack (they will be very soft just out of the oven and fall apart easily).

Chocolate Gingerbread Cookies

Waiting is hard…

Chocolate Gingerbread Cookies {Warm Vanilla Sugar}

Enjoy!

Chocolate Gingerbread Cookies {Warm Vanilla Sugar}

Chocolate Gingerbread Cookies
Adapted from Martha Stewart’s Cookies
Makes 2 dozen big cookies or 4 dozen small cookies

Ingredients:
1 1/2 cups + 1 tbsp (220g) all-purpose flour
1 1/4 tsp ground ginger
1 tsp ground cinnamon
1/4 tsp ground cloves
1/4 tsp freshly grated nutmeg
1 tbsp Dutch-process unsweetened cocoa powder
1/4 lb. (4 oz. or 1 stick) unsalted butter, room temperature
1 tbsp freshly grated ginger (peeled)
1/2 cup (120g) dark brown sugar, packed
1/2 cup (190g) unsulphured molasses
1 tsp baking soda
1 1/2 tsps boiling water
1/2 cup semi-sweet chocolate, chopped
1/2 cup candied ginger, chopped
1/4 cup granulated sugar

Directions:
Sift the flour, ground ginger, cinnamon, cloves, nutmeg, and cocoa together into a medium bowl. Place the butter and grated fresh ginger in the bowl of a stand mixer and beat (with paddle attachment) on medium until the butter is fluffy and light-colored (3-4 minutes). Beat the brown sugar into the butter until combined. Beat the molasses into the butter until combined. In a small bowl, stir the baking soda into the boiling water until dissolved. Pour half of the flour mixture into the butter-sugar mixture and mix until combined. Add the baking soda-water mixture, beat and then add the remaining flour mixture and beat until dough is uniform in color and texture. Mix in the chocolate and candied ginger.

Turn the dough out onto a sheet of plastic wrap. Place another sheet on top and flatten the dough to a 1-inch thickness. Wrap it up and refrigerate for at least 2 hours or overnight.

Remove the dough from the refrigerator and tear off chunks of the dough to roll into balls – about 1 1/2-inches in diameter (I made mine 1-inch diameter). NOTE: work quickly! The dough can get sticky! Set each dough ball on a plate. Refrigerate the finished dough balls for 20 minutes.

Preheat oven to 325°F. Line baking sheets with parchment paper. Roll each ball in the granulated sugar to coat completely, then set on parchment-lined baking sheets, about 2 inches apart.

Bake for 10-12 minute Let cool on baking sheet for 5 minutes before removing to a cooling rack (they will be very soft just out of the oven and fall apart easily).

Store in airtight container for up to 5 days.

Christmas Baking Time – 2012 Edition

I hope you like Christmas baking, because this year it’s all I can afford! You’d think I was kidding, but I’m totally not.

You need to know two things about me.
1. I’m a student and barely make any money.
2. I put all the saved money that I have into running clothes, props for the blog, baking ingredients, high quality food and coffee (the only important things, really).

If you have a blog and have put up a gift guide, don’t fret! It’s not lost on me. I’ll pin and and wish I had the money to buy it and maaaaaaybe get it when it’s 5 years out of style. It’s my thing.

So here we are. Poor, and with a heck of a lot of baking to do. I can guarantee this stuff is top notch. If it’s a recipe of mine, then it’s one I make every single December. If it’s a link to another blog, then it’s something new that I’m JUMPING with excitement to try.

Have the happiest of holidays! What are you baking this year?

Candy:
Puppy Chow
Buckeyes
Rum Balls by My Baking Addiction
Peppermint Patties by Savory Sweet Life
Eggnog Fudge by Brown Eyed Baker

Cake-ish things:
Chocolate Peppermint Roll by Bakers Royale
Gingerbread Cupcakes by Bakers Royale
Eggnog Tres Leches Cake by Cheeky Kitchen
Eggnog Bread by Recipe Girl
Vanilla Snowman Cupcakes with Vanilla Frosting by Skinny Taste

Cookies:
Peanut Butter Chocolate Kiss Cookies
Chocolate Crinkle Cookies
Chocolate Gingerbread Cookies by Martha Stewart
Giant Rainbow Cookies by How Sweet It Is
Chai Cookies by My Baking Addiction

Squares:
Pecan Pie Bars
Nanaimo Bars
Shortbread by The Cookbook Chronicles
Baklava by How Sweet It Is
Toffee Squares by The Pioneer Woman

Nanaimo Bars

Christmas is this weekend! Whoa.

Have I told you that I work in a shopping mall? Well, I do. While I’m going to school I work in a bookstore so that I can pay for college, but it’s more than that. I really like the people I work with, I like talking to customers about books AND I get a mad discount. So things are usually good.

As you know it is currently the holiday season, so this is the time of year where going to work is not so fun. Customers can be angry, rude, and plain and simply crazy! If we don’t have a book they are looking for many of them freak out. Here is some stuff I hear on a daily basis:

Customer: “Five cents for a bag? I donate to enough charities and don’t need to donate to yours”.
My thoughts: I don’t care.

Customer: “Why the hell are you selling books at the Canadian price when the American dollar is at par”?
My thoughts: I don’t make the prices, the publishers do.

Customer: “I’m looking for a book. It’s blue”.
My thoughts: ?

Customer: “I ordered that book a week ago and now it won’t make it for Christmas? I need it NOW”.
My thoughts: Stop last minute shopping.

There are nice customers too. There always are, and of course they usually out number the crazy ones. But it’s the crazy ones that I remember because they’re so ridiculous! People just need to relax. Sit down, have a coffee, and breathe. When I’m stressed I like to run. And when I’m not running I like to bake. It’s a vicious cycle.

I love these nanaimo bars. I was never really into the whole nanaimo thing until I went to my boyfriend’s Grandma’s house back in October and she served these. I fell in love and added them to my Christmas baking list as soon as I got home. The center is more of a buttercream, but still has that custard texture. The crust is buttery and soft and will blow your mind! I hope you enjoy these. I did. My thighs not so much.

Let’s start with the crust. Melt together the butter, brown sugar, and cocoa. I did mine in a pot, but a microwave or a double broiler would be great too!

Beat the egg, and quickly whisk it into the hot chocolate mixture. You need to add the egg slowly and keep the whisk moving, otherwise you will have scrambled eggs! Mix in the graham crackers, coconut, and walnuts.

Press the crust into an 8×8 pan that has been lined with parchment. Put the crust into the fridge to chill for a half hour. I hate waiting.

Cream together the powdered sugar, butter, and custard powder. Add the cream slowly, and beat until light and fluffy, about 5 minutes. Spread the cream layer evenly over the crust. Back in the fridge for another half hour or so.

Melt together the butter and chocolate (either a double boiler or microwave) and pour over the chilled cream layer. Put the pan back in the fridge for it to set up.

Cut into small squares (since they are really rich) and keep in the fridge until ready to serve. Enjoy!

Namaimo Bars
Makes enough for an 8×8-inch pan
Recipe adapted from Baked Bree

Ingredients
Crust:
1/2 cup butter
1/4 cup brown sugar
3 Tablespoons cocoa
1 egg
2 cups graham cracker crumbs
1 cup coconut
1/2 cup chopped walnuts

Middle Layer:
2 cups powdered sugar
1/4 cup room temperature butter
1/4 cup heavy cream
2 Tablespoons custard powder

Chocolate layer:
3 ounces (1/3 cup) chocolate chips
1/4 cup (1 stick) butter

Instructions
Crust:
Start with the crust. Melt together the butter, brown sugar, and cocoa. I did mine in a pot, but a microwave or a double broiler would be great too!

Beat the egg, and quickly whisk it into the hot chocolate mixture. You need to add the egg slowly and keep the whisk moving, otherwise you will have scrambled eggs!

Mix in the graham crackers, coconut, and walnuts. Press the crust into an 8×8 pan that has been lined with parchment. Put the crust into the fridge to chill for a half hour.

Buttercream Layer:
Cream together the powdered sugar, butter, and custard powder. Add the cream slowly, and beat until light and fluffy, about 5 minutes.

Spread the cream layer evenly over the crust. Back in the fridge for another half hour or so.

Chocolate Topping:
Melt together the butter and chocolate (either a double boiler or microwave) and pour over the chilled cream layer. Put the pan back in the fridge for it to set up.

Cut into small squares (since they are really rich) and keep in the fridge until ready to serve.

Chocolate Crinkle Cookies

I love when things go right. You know? Like when you do well on that test you studied so hard for? Or even better – you change your hair colour and get a happy surprise when you look in the mirror. I love that. Seriously. Sometimes I want to take my hair stylist out for a fancy dinner and shower her in gifts.

These cookies went right into my mouth. Not only are they totally cute, but they crackled perfectly while baking AND had the chewiest, fudgiest, center! A total success and a new favorite cookie of mine.

So, add these to your holiday baking list! Because you like it when things go right too. I can feel it.

Let’s begin, shall we? In a medium bowl, mix together cocoa, white sugar, and vegetable oil.

Beat in eggs one at a time, then stir in the vanilla.

Combine the flour, baking powder, and salt and stir it into the cocoa mixture. Cover dough, and chill for at least 4 hours. Waiting is stupid…but necessary.

Roll dough into one inch balls with lightly oiled palms (you can use a cookie scoop to portion the dough, a tablespoon or a rounded teaspoon depending on what size you like).

Coat each ball in confectioners’ sugar before placing onto prepared cookie sheets.

Ok, now that’s just pretty…

Bake in preheated oven for 10 to 12 minutes. Let stand on the cookie sheet for a minute before transferring to wire racks to cool. Enjoy everyone!

Chocolate Crinkle Cookie
Recipe adapted from 17 and Baking
Makes 3 dozen cookies

Ingredients:
1 cup unsweetened cocoa powder
2 cups white sugar
1/2 cup vegetable oil
4 eggs
2 teaspoons vanilla extract
2 cups all-purpose flour
2 teaspoons baking powder
1/2 teaspoon salt
1/2 cup confectioners’ sugar

Directions
In a medium bowl, mix together cocoa, white sugar, and vegetable oil. Beat in eggs one at a time, then stir in the vanilla.

Combine the flour, baking powder, and salt; stir into the cocoa mixture. Cover dough, and chill for at least 4 hours.

Preheat oven to 350 degrees F. Line cookie sheets with parchment paper.

Roll dough into one inch balls with lightly oiled palms (you can use a cookie scoop to portion the dough, a tablespoon or a rounded teaspoon depending on what size you like).

Coat each ball in confectioners’ sugar before placing onto prepared cookie sheets.

Bake in preheated oven for 10 to 12 minutes.

Let stand on the cookie sheet for a minute before transferring to wire racks to cool.

Christmas Baking Time – 2011 edition

Holy December! It’s here! I can finally turn on Justin Beiber’s Mistletoe my Christmas music and dance around my living room. I can finally decorate without feeling overeager and I can finally get into the spirit!

Nothing gets me into the Christmas spirit like Christmas baking. The smells of family favorite recipes, ginger, chocolate, and mint fill my apartment with sweet scents and memories. I genuinely feel an intense sense of happiness when something is in the oven. Who doesn’t though really?

This year I have a sassy line up of baked goods old and new and I’m so excited to share! What are you baking this year?

Candy:
Puppy Chow
Buckeyes
Oreo Balls by How Sweet It Is
Salted Butter Caramels by Our Kitchen
Rum Balls by My Baking Addiction
Peanut Brittle by Brown Eyed Baker

Cake-ish things:
Christmas Tree Cupcakes by Confessions of a Cookbook Quees
Chocolate Peppermint Roll by Bakers Royale

Cookies:
Peanut Butter Chocolate Kiss Cookies
Gingerbread Gals and Dudes by Bake at 350
Peppermint White Chocolate Mocha Cookies by Sugarcrafter
Chocolate crinkle cookies – recipe to come!

Squares:
Pecan Pie Bars
Chocolate and Peanut Butter Dreams
Butterscotch Marshmallow Squares
Easy Lemon Crumb Bars
Nanaimo Bars by Baked Bree.
Eggnog Cheesecake Bars by Brown Eyed Baker
Shortbread by The Cookbook Chronicles

Happy Baking!! I can’t wait to hear what you come up with. Time to set up my tree!

Christmas Baking – Puppy Chow

This stuff looks strange.

I remember seeing this ugly snack for the first time. I was at a girls Secret Santa Christmas party and my friend brought it as her potluck treat. I thankfully accepted her contribution to the food table, eyeing the strange mixture of whatever-it-was as I placed it with the other food. I tried the snack to be polite, and then…I was HOOKED! Sure, this “Puppy Chow” isn’t anything to look at, but it’s tasty. It’s filled with peanut butter, chocolate and icing sugar and makes me a very happy girl. A very, very, happy girl.

To begin, melt PB and chocolate chips in a big pot on the stove. Once melted, take off the heat.

Put box of Crispix in a big bowl, and add melted chocolate and PB.

Stir everything together until Crispix is covered with the choco/PB mixture.

Pour into two large freezer bags.

Add icing sugar.

And now shake that mixture silly to “Jingle Bells”!

Put your freezer bags in the fridge or freezer to solidify the mixture, and then you’re all done! This is such a great gift. You can doll it up is a nice Christmas tin, or bag with a bow. It’s cheap, easy, tasty and fun!

Happy Holidays Everyone!

Puppy Chow recipe

Ingredients:
1 box “Crispix” cereal
2 cups milk chocolate chips
2 cups peanut butter
1 small bag icing sugar

Directions:
1. Melt PB and chocolate chips in a big pot on the stove.
2. Once melted, take off heat.
3. Put box of Crispix in a big bowl, and add melted chocolate and PB.
4. Stir everything together until Crispix is covered with the chocolate and PB mixture.
5. Pour into two large freezer bags, and then add icing sugar.
6. Shake until covered (however much icing sugar you feel you need).
7. Cool in fridge/freezer (I always freeze mine).

Christmas Baking – Butterscotch Marshmallow Squares

I don’t know why I don’t just pretend it’s Christmas every month. I’m having so much fun!! I wake up, turn on some good Christmas oldies (Tony Bennett’s “I’ve got my love to keep me warm” is on currently) and get to baking. It’s heaven in my kitchen every day. My hands smell like brown sugar and butter, and I have butterscotch on my cheek with no worries.

This recipe, is an old one from my Great Aunt. I remember several Christmas goodies that she made, but these Butterscotch squares were my favorite. If my six year old self would have known how easy these were, she would have been a butterball herself.

First add your butter to a saucepan over medium heat.

Add your butterscotch chips.

Add your peanut butter.

Let them melt together and then take your pot off of the heat. Let mixture cool down a little for about 8 minutes.

Get 2 cups of mini marshmallows ready and add them to the butterscotch mixture.

Mix together melted ingredients with marshmallows, and place in a 9 x 9-inch square pan. Cool in the refrigerator (about 3 hours).

When the butterscotch goodness is ready, cut it into 16 squares and enjoy.

Ingredients:
½ cup butter
1 cup peanut butter
2 small or 1 large pkgs of butterscotch chips
2 cups of mini marshmallows

Directions:
1. Melt butter, peanut butter, and butterscotch chips together in a saucepan over medium heat.
2. Mix together melted ingredients with marshmallows, and place into a 9 x 9-inch square pan.
3. Refrigerate for approximately 3 hours.
4. Cut into squares and enjoy! These will keep for up to a week in the fridge. You can freeze them too :)

Christmas Baking – Buckeyes

WARNING if you want to consume mass amounts of peanut butter and chocolate immediately this post is not for you. You must let the dough set for a couple of hours in the fridge before the chocolate dipping begins. Life is hard.

It’s Christmas baking time. I have been thinking and re-thinking my baking list non-stop this year. I’m. So. Excited!! Every post this month will be something from my Christmas baking list. The list I have contains easy recipes that I bake every year for the holidays, all of which are freezable. For my first post I thought I’d share my Buckeye recipe with you. This recipe comes from my sister’s Grandma (yes, my parents are divorced) who bakes up a storm every year.

To begin, grab some peanut butter (2 cups to be exact).

Put that peanut butter in a bowl along with 4 1/2 cups of icing sugar, a stick of butter, and 1 tsp of vanilla.

Mix all the ingredients together and put your bowl in the fridge. Yes, I switched bowls (this one was smaller for my fridge).

Now is the sad part – you have to wait to roll the peanut butter goodness into balls. I always make this recipe the night before the chocolate dipping, but if you like things done NOW, it’s ok! You can refrigerate the dough for 4 hours or so, and it is still fine. Once you have waited for your dough to cool, you can roll it into 1-inch balls. Set them on a cookie sheet lined with wax paper and insert a toothpick into each ball.

Now you have to wait again. Really? Yes, really. You want perfect buckeyes remember?! Chill your balls (tee hee) in the freezer until hard, approximately 30 minutes. While the dough is in the freezer melt your chocolate chips and shortening over medium heat. Remove the pan from heat.

Dip balls in chocolate and place back on cookie sheet.

Refrigerate (again) until chocolate is set, approximately 2 hours. And now, the good part. Eat your heart out beautiful. You deserve it.


Grandma’s Buckeye’s
Makes 40 peanut butter balls

Ingredients:
Balls
2 cups peanut butter
4 1/2 cups icing sugar
½ cup (1 stick) butter
1 tsp vanilla

Chocolate dip
4 cups semisweet chocolate chips
1/4 cup shortening

Directions:
1. Mix together the “balls” ingredients, and refrigerate overnight, or for at least 4 hours.
2. Roll dough into 1-inch balls. Set them on a cookie sheet lined with wax paper and insert a toothpick into each ball. Chill in freezer until hard, approximately 30 minutes.
3. Melt chocolate chips and shortening over medium heat. Remove the pan from heat. Dip balls in chocolate and place back on cookie sheet. Refrigerate until chocolate is set, approximately 2 hours.